Below you will find a number of examples of how you can use
gewel to create simple animations. Each is self-contained
and designed to illustrate just one of two specific concepts.
Each code sample is followed by a gif image that illustrates
the result of running it.
You can combine the concepts illustrated here to create all kinds
of different animations of your own.
Each of the code samples is mostly made up of scripting phase code.
(See The Scripting Phase.)
We can think of scripting phase code as code that writes a
script describing what various objects in the animation should do
at various times.
The lines in the scripting phase that are most critical to the
feature the code sample is attempting to illustrate are highlighted.
The final two lines of each code sample are rendering phase code.
(See The Rendering Phase.)
In order to keep the samples simple and portable, and to produce the
animations shown in this document, we simply write each
Scene we produce out to a .gif file.
In many cases, you will want to use a Mp4Recorder
instead of a GifRecorder in the rendering phase.
When you are developing and interactively debugging, you are likely to want to
use a Player. When you use a
Player, you get interactive controls and you
don’t have to wait for the entire scene to render before you start playing it.
If you would like to switch to using a player, replace the rendering phase lines:
Here is an example of how fade_to() works. We will
create a MarkerDot, which is a class derived from
Drawable
and give it an initial alpha of 0.0, meaning
it is entirely transparent. We will then fade it in to full opacity (alpha = 1.0)
and then fade it back to 0.0 so it is fully transparent again.
We will then wrap it in a
Scene and save that scene to a .gif file.
In Using rotate_to() we used rotate_to()
to rotate a XYDrawable. If you prefer
degrees to radians, you can use rotate_to_degrees()
instead of rotate_to(). All you have to
do is change line 13 in the code above to line 11 in the code below
and remove the now unneeded importnumpyasnp
at the top to produce the following code:
In the examples above, we created objects of the classes
MarkerDot and
MarkerUpArrow, but we did not
properly introduce the classes. Both are derived from the
abstract base class MarkerDot,
which has other derived classes such as MarkerX,
MarkerO, and MarkerPlus.
These are all illustrated in the following code sample:
Markers are good enough for sample animations that are just
trying to teach someone about APIs, but they are rarely
sufficient for real animations. Often you will want to import
.png files created elsewhere into your animations.
PngDrawable is the class that
lets you do this.
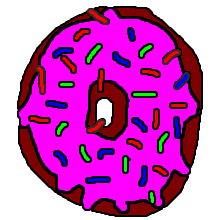
Here is an example of how to construct a PngDrawable
and rotate it 360 degrees, then wrap it in a
Scene and save that scene to a .gif file. Note that if
you want to run this code sample you will also need to download
donut.png and put it in the same directory
you run the sample code from.
move_to() is a great way to create
movement in your animations. But it is limited to linear movement. There are
two more advanced methods we can use:
quadratic_move_to(), which follows
a quadratic path, and bezier_move_to(),
which follows a cubic path.
When working with these higher degree polynomial paths, it is sometimes
useful to have a visual guide indicating the desired path. We call these
visual guides scaffolding. All of the methods that move objects have
and optional scaffolding argument whose default value is False.
If it is set to true, scaffolding is generated and returned as a
Drawable.
We illustrate both quadratic and cubic paths, along with the use of
scaffolding, below.
Here is an example of how quadratic_move_to() works. We will
create a XYDrawable and move it, then wrap it in a
Scene and save that scene to a .gif file. In order
to make it more clear what is happening, we will also use the scaffolding
feature to show where the current position, control point, and final
position are, as well as the quadratic path we expect the object to follow.
The path that the object follows is defined by its initial location
\((x_0, y_0)\), a control point \((x_1, y_1)\), and it’s final
location \((x_2, y_2)\). The initial location is the location of
the object before the method is called. The control point and final
location are specified as parameters.
Notice that the current and final positions as well as the control point and the
path of motion are rendered as scaffolding.
Here is an example of how bezier_move_to() works. We will
create a XYDrawable and move it, then wrap it in a
Scene and save that scene to a .gif file. In order
to make it more clear what is happening, we will also use the scaffolding
feature to show where the current position, two control points, and final
position are, as well as the path we expect the object to follow.
The path that the object follows is defined by its initial location
\((x_0, y_0)\), two control points \((x_1, y_1)\) and \((x_2, y_2)\),
and it’s final location \((x_3, y_3)\). The initial location is the location of
the object before the method is called. The control points and final
location are specified as parameters.
Notice that the current and final positions as well as the control points and the
path of motion are rendered as scaffolding.
Scripting-time methods like move_to(),
rotate_to(), and
fade_to() take
an optional parameter update_time that has a default value of
True. If this parameter is True then the object’s notion
of what time it should start the next action (known as the next-action time)
is increased by the duration parameter. Setting update_time=False causes this
not to happen. This enables the object to take several actions
simultaneously.
For example, suppose we want an object to move, but also rotate at the same time.
We can call move_to() with
update_time=False, then call rotate_to().
Since the next-action time was not updated during the move, the rotation starts when
the move started.
In addition to the update_time parameter, we can use the
wait() method to update the time but not
create any additional motion.
The following example demonstrates several how we can create a variety of effects
by combining these techniques. Note that we also add a TimeClock
to the scene to keep track of time. This class is normally added for visual
debugging during scene development and removed before final rendering. Watch the clock
and the motion and that should help you reason about what the code is doing and
why rotation and motion happen when they do.
1fromgewel.colorimportORANGE 2fromgewel.drawimportMarkerUpArrow,Background,Scene,TimeClock 3fromgewel.recordimportGifRecorder 4 5# Scripting phase: 6 7background=Background() 8clock=TimeClock(x=20,y=30,font_size=20,z=10.0) 910drawable=MarkerUpArrow(x=32,y=240,height=64,color=ORANGE,line_width=3)1112# Rotate while moving. We do this by not updating the13# drawable's next-action time during the move. As a14# result, the next action, which is the rotation, starts15# at the same time the move started. Since we did not16# add update_time=False to the rotation, the next-action time17# will be set to when the rotation ends, two seconds18# into the scene.19drawable.move_to(608,240,duration=2.0,update_time=False)20drawable.rotate_to_degrees(360,duration=2.0)2122# The next-action time is now two seconds into the scene.23# Let's wait two seconds doing nothing. That will leave the24# next-action time set to four seconds into the scene.25drawable.wait(duration=2.0)2627# Now let's move back, again without updating the next-action28# time.29drawable.move_to(32,240,duration=2.0,update_time=False)3031# But this time we will wait for one second while we are moving,32# so the next-action time will be one second after the move33# started, which will be five seconds into the scene.34drawable.wait(duration=1.0)3536# And them spin back during the final second of motion.37# This should begin at five seconds into the scene, when38# we have moved halfway back to the starting position. It39# should end six seconds into the scene when we are back40# at the initial position.41drawable.rotate_to_degrees(0,duration=1.0)4243# Now wait for another two seconds. This takes us to the44# end of the scene at the eight second mark.45drawable.wait(duration=2.0)4647scene=Scene([background,drawable,clock])4849# Rendering phase:5051recorder=GifRecorder('update_time.gif')52recorder.record(scene)
That code produces the following gif as output:
The output resulting from our use of the update_time=False parameter
to and move_to() and the method
wait().
In the examples above, we used scripting methods such as
bezier_move_to(), with or
without update_time=True, and
wait() to script
animation scenes.
In addition to these methods, there is another approach we can use,
which is called motion linking. Motion linking connects one or
more properties of a Drawable to that
of another. It can be used to produce effects like one object following
another.
Motion linking is typically done in two steps. First, we create one or
more Drawable objects and script them as
in the examples above. Second, we create one or more additional
Drawable objects and assign one or more
of their properties (typically things like their x and y location)
to values from the first set of objects.
The key thing to remember is that the properties we are working with are
time-varying values, meaning that they are not fixed, but rather vary over
time. For example, once we have called the
bezier_move_to() method on an object,
both it’s x and y coordinates are time-varying. That’s what produces
the motion. The value at time t1 is different than the value at t0.
When we do motion linking, we step outside the timeline that
bezier_move_to(),
wait_for(), and all the other
methods we discussed above operate on, and assign a property of one object
to match a property of another at all times. This is why we need to fully
script the first object before we do motion linking.
Note that we can also create time-varying values as expressions of
time-varying values and constants. For example, if x is a time-varying
value then v=2*x+10 is also. The value of v at any given
time is twice that of x at the time plus 10.
Here is a simple example where we have one object track the x coordinate
of another and the y coordinate track an expression of the y coordinate
of the other.
1fromgewel.colorimportGREEN,ORANGE 2fromgewel.drawimportMarkerX,MarkerPlus,Background,Scene 3fromgewel.recordimportGifRecorder 4 5# Scripting phase: 6 7background=Background() 8 9# Script d010d0=MarkerX(x=32,y=100,color=ORANGE,line_width=3)11d0.move_to(608,200,duration=2.0)12d0.move_to(608,100,duration=1.0)13d0.move_to(32,100,duration=1.5)1415# Link the motion of d1 to that of d0.16# It will follow d0 but 100 pixels below.17d1=MarkerPlus(x=0,y=0,color=GREEN,line_width=3)18d1.x=d0.x19d1.y=d0.y+1002021# Note that we can produce the same results by22# setting x and y directly in the constructor.23d1=MarkerPlus(x=d0.x,y=d0.y+100,color=GREEN,line_width=3)2425# Assemble the scene.26scene=Scene([background,d0,d1])2728# Rendering phase:2930recorder=GifRecorder('motion_track_x.gif')31recorder.record(scene)
That code produces the following gif as output:
The output resulting from our use of motion tracking.
In addition to the tracking methods shown above, there
is a track() method that can be
used to have one object track another at a given x and
y offset. Here is an example of how it is used.
1fromgewel.colorimportGREEN,ORANGE 2fromgewel.drawimportMarkerX,MarkerPlus,Background,Scene 3fromgewel.recordimportGifRecorder 4 5# Scripting phase: 6 7background=Background() 8 9# Script d010d0=MarkerX(x=32,y=100,color=ORANGE,line_width=3)11d0.move_to(32,200,duration=1.0)12d0.move_to(608,100,duration=2.0)13d0.move_to(32,100,duration=2.0)1415# Link the motion of d1 to that of d0.16# It will follow d0 but 100 pixels below.17d1=MarkerPlus(x=32,y=200,color=GREEN,line_width=3)18d1.track(d0,0.0,100.0)1920# Assemble the scene.21scene=Scene([background,d0,d1])2223# Rendering phase:2425recorder=GifRecorder('motion_track.gif')26recorder.record(scene)
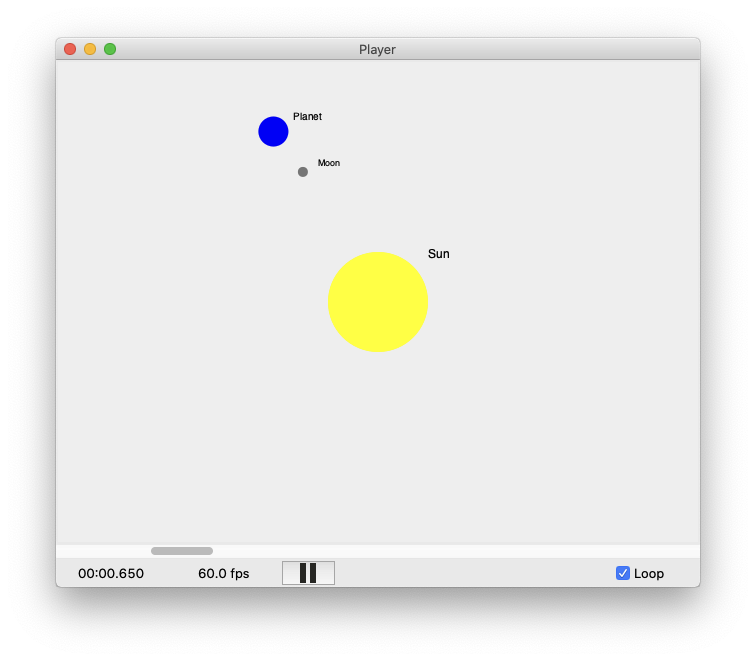
We can now put together some of the motion linking
approaches we just saw above, along with a new one called
orbit(), to create an animated
solar system. Here is the code:
Sometimes we don’t want one object to completely track
another, but instead we want just part of it, like an
endpoint or a control point, to track another.
Here is an example, using a BezierDrawable
with it’s points linked to other objects. We will
create some MarkerPlus objects for the end points and some
MarkerX objects for the control points. We will then
animate the end points so they move up and down. Next, we will construct
a BezierDrawable from the points. Finally, we will render this all in a
Scene and save that scene to a .gif file.
1fromgewel.colorimportBLUE,ORANGE,PURPLE,RED 2fromgewel.drawimportBackground,BezierDrawable,Scene,MarkerPlus,MarkerX 3fromgewel.recordimportGifRecorder 4 5# Scripting phase: 6 7background=Background() 8 9point0=MarkerPlus(40,40,line_width=2,color=RED)10point1=MarkerX(80,240,line_width=2,color=ORANGE)11point2=MarkerX(560,240,line_width=2,color=PURPLE)12point3=MarkerPlus(600,440,line_width=2,color=BLUE)1314# Make the endpoints move up and down in15# sequence.1617point0.move_to(40,440,duration=1.5)1819point3.wait_for(point0)20point3.move_to(600,40,duration=1.5)2122point0.wait_for(point3)23point0.move_to(40,40,duration=1.5)2425point3.wait_for(point0)26point3.move_to(600,440,duration=1.5)2728# A Bezier based on the points above, some29# of which will be in motion.30bezier=BezierDrawable(31point0.x,point0.y,32point1.x,point1.y,33point2.x,point2.y,34point3.x,point3.y,35)3637scene=Scene([background,point0,point1,point2,point3,bezier])3839# Rendering phase:4041recorder=GifRecorder('linked_bezier.gif')42recorder.record(scene)
That code produces the following gif as output:
Notice that as the end points move, the shape of the Bezier
curve changes accordingly. This is a simple example, but it
illustrates how properties of objects that are time-varying
can be linked.
Here is an another example, using a QuadraticDrawable
with it’s points linked to other objects. We will
create some MarkerPlus objects for the end points and a
MarkerX object for the control point. We will then
animate the control point so it moves up and down. Next, we will construct
a QuadraticDrawable from the points. Finally, we will render this all in a
Scene and save that scene to a .gif file.
1fromgewel.colorimportBLUE,ORANGE,RED 2fromgewel.drawimportBackground,QuadraticCurveDrawable,Scene,MarkerPlus,MarkerX 3fromgewel.recordimportGifRecorder 4 5# Scripting phase: 6 7background=Background() 8 9point0=MarkerPlus(40,40,line_width=2,color=RED)10point1=MarkerX(40,440,line_width=2,color=ORANGE)11point2=MarkerPlus(600,440,line_width=2,color=BLUE)1213# Make the control point move from corner to corner.1415point1.move_to(600,40,duration=1.5)16point1.move_to(40,440,duration=1.5)1718# A quadratic curve based on the points above, some19# of which will be in motion.20quad=QuadraticCurveDrawable(21point0.x,point0.y,22point1.x,point1.y,23point2.x,point2.y,24)2526scene=Scene([background,point0,point1,point2,quad])2728# Rendering phase:2930recorder=GifRecorder('linked_quadratic.gif')31recorder.record(scene)
That code produces the following gif as output:
Notice that as the control point moves, the shape of the quadratic
curve changes accordingly. This is a simple example, but it
illustrates how properties of objects that are time-varying
can be linked.
We can use expressions and multiple objects to create a variety
of effects with motion linking. In the next example, we will
use motion linking to create wheels on a wagon that rotate as the
wagon moves.
1fromgewel.colorimportBLACK,DARK_GRAY,RED 2fromgewel.drawimportBox,MarkerPlus,MarkerO,Background,Scene 3fromgewel.recordimportGifRecorder 4 5# Scripting phase: 6 7background=Background() 8 9# The wagon.10wagon=Box(x=20,y=100,width=160,height=32,color=DARK_GRAY,fill_color=RED)11wagon.move_to(620-wagon.width,100,duration=1.5)12wagon.move_to(20,100,duration=3.0)1314# Wheels move with wagon and rotate as it moves.15wheels=[]16tires=[]17foriiinrange(2):18wheel=MarkerPlus(19x=wagon.x+10+140*ii,y=wagon.y+wagon.height+4,20width=32,line_width=2,color=DARK_GRAY,z=1.021)2223tire=MarkerO(24x=wheel.x,y=wheel.y,25width=wheel.width+2,line_width=5,color=BLACK,z=2.026)27wheels.append(wheel)28tires.append(tire)2930# Rotate with linear motion of the wagon. When the31# wheel rotates theta radians, the x distance the32# wagon travels is theta * r, where r is33# the radius of the tire. Since we know x,34# we can compute theta = x / r.35radius=(tire.width+tire.line_width)/236wheel.theta=wagon.x/radius3738# Assemble the scene.39scene=Scene([background,wagon]+wheels+tires)4041# Rendering phase:4243recorder=GifRecorder('motion_track_wheels.gif')44recorder.record(scene)
Notice that the wagon moves at twice as fast from left to right
as it does from right to left. Since the angle of the wheels is linked
to position, the wheels rotate twice as fast when the wagon is moving
from left to right as they do when it moves from right to left.
We never had to explicitly specify that behavior for the wheels.
The fact that their angle is linked to the x position of the wagon
made it happen.
If you would like to learn more about how the time-varying values
(tvx) that enable motion linking work, see tvx: An Introduction.
Teleprompter objects are boxes of
scrolling text that can be synchronized
to the actions of other objects on the screen. They are typically
used to synchronize voice-over dialog with other actions in
the animation. A voice-over artist can then read along with them
to record an audio track to go with the animation. They can also
be left in the final animation as subtitles.
1fromgewel.colorimportORANGE,YELLOW,Color 2fromgewel.drawimportMarkerDot,Background,Scene,Teleprompter,sync 3fromgewel.recordimportGifRecorder 4 5# Scripting phase: 6 7background=Background() 8 9# Create our teleprompter.10teleprompter=Teleprompter(1130,400,580,70,12font_size=24,13color=YELLOW,14fill_color=Color(0.25,0.25,0.25,0.75)15)1617# Start with an invisible drawable.18drawable=MarkerDot(x=320,y=240,width=64,color=ORANGE,alpha=0.0)1920# Now we will alternately add text to the teleprompter21# and start actions we are describing in the animation.2223teleprompter.add_script(24"""The orange dot is a mysterious creature. 2526 Sometimes you don't even realize it is there, but27 it just slowly fades in.28 """29)3031drawable.fade_to(1.0,duration=8.0)3233# Whichever one is slower should wait for the other34# before the scene continues.35sync((drawable,teleprompter))3637teleprompter.add_script(38"""But as soon as you see it...39 It quietly moves away.40 """41)4243drawable.move_to(800,600,duration=6.0)4445scene=Scene([background,drawable,teleprompter])4647# Rendering phase:4849recorder=GifRecorder('teleprompter.gif')50recorder.record(scene)


